How to Do a Red Lip Look [Classic & Bold]
The Art of the Perfect Red Lip: A Guide to Timeless Elegance

Perfecting the Application Process
Creating that iconic red lip look requires more than just a quick swipe of color. The foundation of any great lip look begins with proper preparation. Start by gently buffing away dry skin with a soft toothbrush or sugar scrub - this creates the ideal smooth surface for color application. Many makeup artists swear by applying a hydrating lip mask 10 minutes before starting your routine, then blotting away excess moisture.
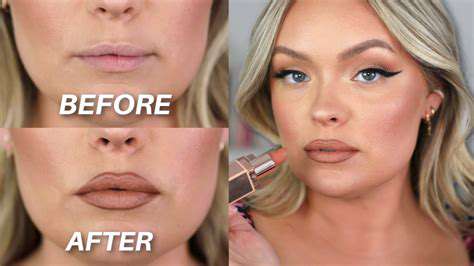
When it comes to application, professional makeup artists recommend this technique: First, use a lip liner that closely matches your natural lip color (not necessarily the lipstick shade) to outline just outside your natural lip line. This creates subtle fullness while preventing that obvious drawn-on look. Then, fill in the entire lip area with the liner to create a color base. Apply your red lipstick with a flat lip brush, starting from the center and working outward in small strokes. Blot with tissue, then apply a second thin layer for maximum staying power.
Keeping Your Red Lip Flawless All Day
Maintaining vibrant color requires strategic planning. After your final lipstick application, take a single-ply tissue and hold it gently against your lips, then dust a tiny amount of translucent powder over it with a fluffy brush. This sets the color without dulling its vibrancy. For touch-ups, keep a mini version of your lipstick and a clean lip brush in your purse - reapplying over existing color often leads to clumping.
The secret to all-day wear lies in the blot-and-layer technique: After initial application, blot lightly, then apply a second thin layer. This builds color intensity while creating a stain-like base that lasts through meals. For evening events, some makeup artists recommend applying a thin layer of lipstick, then placing a tissue over the lips and dusting with powder before applying the final color layer - this creates an incredibly long-wearing base.
When removing your lipstick at night, avoid harsh rubbing. Instead, apply a oil-based cleanser or pure coconut oil to a cotton pad, hold it against your lips for 30 seconds, then gently wipe away. Follow with a hydrating lip treatment to keep your lips in perfect condition for next time.
Choosing and Styling Your Perfect Red
Finding Your Ideal Red Hue
Selecting your signature red involves more than just skin tone considerations. The shape of your lips plays a role too - deeper reds can make thin lips appear fuller, while bright cherry reds work beautifully on naturally full lips. Observe your natural lip color in daylight; those with more pigmented lips often need richer, deeper reds to show up true to color.
An often-overlooked tip: test lipsticks on your fingertips rather than your hand. The skin tone here more closely matches your lips. When trying new shades, apply to clean, moisturized lips (no other makeup) and observe in natural light. The right red should make your teeth appear whiter and your eyes brighter - if it has the opposite effect, try a different undertone.
Advanced Application Techniques
For those wanting to truly master the red lip, consider these professional techniques:
- Use a slightly lighter concealer around the lip edges (applied with a tiny brush) to create crisp, clean lines
- Try the gradient lip technique by applying deeper color to the center of lips and blending outward
- For ultra-matte looks, some artists lightly press powder over the final application using a velvet puff
Remember that lip shape changes slightly with age. Re-evaluate your application technique annually - you might find adjusting your liner placement by just 1mm makes a significant difference in how youthful your smile appears.
Complementary Makeup Pairings
A bold red lip demands careful balance in the rest of your makeup. The modern approach favors either:
- A completely bare eye with just groomed brows and mascara
- Soft brown shadow blended through the crease with tightlined upper lashes
Cheek color should be subtle - a cream blush in a neutral peach or pink applied lightly to the apples of cheeks keeps the focus on your lips. For evening, a tiny dot of gold highlighter at the cupid's bow adds dimension without competing with the bold lip color.
Professional Secrets for Enduring Color
The Longevity Formula
Stage and screen makeup artists use these tricks for performances that last hours:
| Time Frame | Maintenance Step |
|---|---|
| Every 2 hours | Blot gently with tissue, no reapplication needed |
| After eating | Clean edges with concealer on a lip brush before touching up |
| Midday refresh | Apply a thin layer of balm, let absorb 1 minute, then reapply color |
The key to all-day wear is preventing the need for complete reapplication - small, strategic touch-ups maintain the look without buildup.
Seasonal Adjustments
Your perfect red lip routine should adapt to weather changes:
- Winter: Add an extra hydration step - apply treatment balm overnight
- Summer: Switch to a transfer-proof liquid formula that won't melt
- Humid climates: Use a wax-based pencil as a base to prevent feathering
- Dry climates: Mix a drop of facial oil with your lipstick for comfort
Remember that lighting affects how your lip color appears. The red that looks perfect in office fluorescent lighting might need adjusting for candlelit dinners. Keep a slightly deeper shade for evening wear.
Troubleshooting Common Issues
Even pros encounter these challenges - here's how they solve them:
Problem: Color bleeds into fine lines around mouth
Solution: Apply a tiny amount of eye primer to the lip perimeter before lining
Problem: Lipstick feathers on one side more than the other
Solution: You may subconsciously lick or press lips together more on that side - try a more hydrating formula
Problem: Color fades unevenly, leaving a ring
Solution: Exfoliate more thoroughly and use a lip stain as base before applying lipstick
Read more about How to Do a Red Lip Look [Classic & Bold]

![Skincare Tips for Winter [Hydration Focus]](/static/images/29/2025-05/HydratingfromWithin3ATheRoleofDietandHydration.jpg)


Hot Recommendations
- Grooming Tips for Your Bag and Wallet
- Best Base Coats for Nail Longevity
- How to Treat Perioral Dermatitis Naturally
- How to Use Hair Rollers for Volume
- How to Do a Graphic Eyeliner Look
- Best DIY Face Masks for Oily Skin
- Guide to Styling 4C Hair
- Guide to Improving Your Active Listening Skills
- How to Fix Cakey Foundation
- Best Eye Creams for Wrinkles